The drain hose on a Whirlpool dishwasher is one of those components you never think about, until water starts pooling at the bottom of the tub or you walk into a puddle on your kitchen floor. This corrugated rubber or plastic hose is responsible for evacuating wastewater from your dishwasher to the sink drain or garbage disposal, and when it fails, it can turn an otherwise reliable appliance into a frustrating headache. Whether you’re diagnosing a drainage issue, replacing a damaged hose, or installing a new dishwasher from scratch, understanding how this critical component works will save time, money, and cleanup duty.
Table of Contents
ToggleKey Takeaways
- A Whirlpool dishwasher drain hose is a flexible conduit that evacuates wastewater and must be properly installed to prevent leaks, backflow, and water damage.
- Common drain hose problems include kinks, clogs from grease and detergent residue, cracks from aging, loose clamps, and improper positioning that allows wastewater to siphon back into the dishwasher.
- Inspect your drain hose for visible kinks, moisture around connections, cracks, loose clamps, and sagging high loops—early detection prevents costly repairs.
- Most DIYers can replace a Whirlpool dishwasher drain hose in under an hour by disconnecting both ends, routing the new hose with a secure high loop, and tightening stainless steel clamps.
- Proper drain hose installation requires a high loop secured to the countertop, hose runs of 6 feet or less, and an air gap fitting if required by local plumbing codes to prevent backflow.
- Regular maintenance—including monthly filter cleaning, annual hose inspections, and prompt attention to slow drainage—extends your drain hose lifespan and prevents pump strain.
What Is a Dishwasher Drain Hose and Why Does It Matter?
A dishwasher drain hose is a flexible, ribbed conduit, typically made of rubber, PVC, or thermoplastic, that carries wastewater from the dishwasher pump to your home’s plumbing system. On Whirlpool models, these hoses are generally 5/8-inch or 7/8-inch inside diameter and range from 5 to 10 feet in length, depending on the model and installation configuration.
The hose connects at one end to the drain pump outlet on the dishwasher and at the other to either a garbage disposal inlet, a sink tailpiece with a dishwasher wye, or an air gap fitting (required by code in some jurisdictions). Its job is simple: move dirty water out efficiently without leaking, kinking, or allowing backflow.
When the drain hose is compromised, cracked, clogged, or improperly installed, water can’t exit the tub. This leads to standing water, incomplete wash cycles, and potential water damage to cabinetry or flooring. Worse, a hose that’s positioned incorrectly can allow wastewater to siphon back into the clean dishwasher, contaminating dishes. That’s why proper installation and periodic inspection are non-negotiable for reliable dishwasher performance.
Common Whirlpool Dishwasher Drain Hose Problems
Most Whirlpool dishwasher drain issues trace back to a handful of recurring hose problems. Recognizing the symptoms early can prevent a minor annoyance from escalating into a costly repair or replacement.
Kinks and sharp bends are the most frequent culprits. During installation or when the dishwasher is pushed back into the cabinet, the hose can crimp or fold, restricting water flow. This often results in slow drainage or standing water after a cycle.
Clogs develop over time as food particles, grease, and detergent residue accumulate inside the hose, especially near the connection points. According to experts on common dishwasher issues, blockages are a leading cause of drainage failure.
Cracks and splits happen as the hose ages, particularly where it bends or connects to fittings. Rubber and plastic degrade with heat exposure and chemical contact from detergents, leading to brittleness and eventual failure.
Loose or corroded clamps allow the hose to slip off fittings or permit slow leaks that may go unnoticed until you spot moisture or mold under the sink or behind the dishwasher.
Improper positioning, such as a hose that’s too low or lacks a proper high loop or air gap, can cause wastewater to backflow into the dishwasher, creating unsanitary conditions and preventing the unit from draining completely.
How to Inspect Your Whirlpool Dishwasher Drain Hose
Before assuming you need a new hose, a thorough inspection can identify whether the problem is minor and fixable or requires replacement. Start by disconnecting power to the dishwasher at the breaker, water and electricity don’t mix, and you’ll be working near both.
Open the lower cabinet door under your sink and locate the drain hose where it connects to the garbage disposal or sink drain. Trace the hose back to the dishwasher, checking for:
- Visible kinks or sharp bends that could restrict flow
- Moisture, water stains, or mold around connection points, indicating leaks
- Cracks, splits, or brittleness in the hose material, especially at bends
- Loose or rusted hose clamps that may need tightening or replacement
To check for internal clogs, disconnect the hose at both ends (have a bucket and towels ready, there will be residual water). Run water through the hose from a faucet or use a plumber’s snake or bottle brush to clear blockages. If water flows freely, the hose itself is likely fine, and the issue may be with the dishwasher pump, drain filter, or disposal.
Inspect the high loop or air gap. The hose should rise to just below the countertop level before descending to the drain connection. If it’s sagging or lying flat, you’ve found your problem.
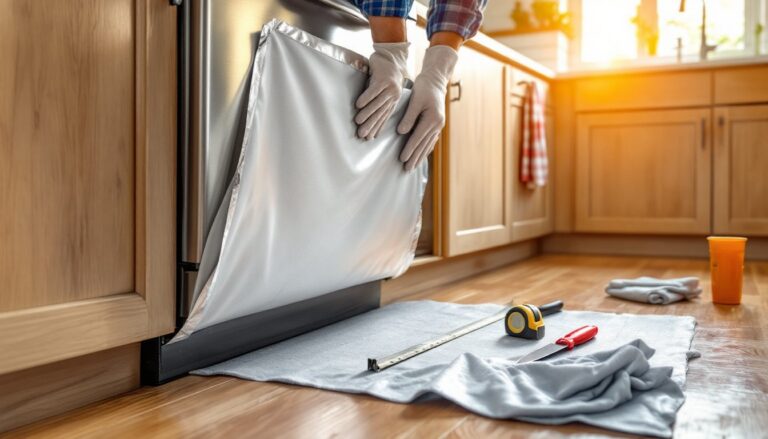
Step-by-Step: Replacing Your Whirlpool Dishwasher Drain Hose
Replacing a drain hose is a straightforward repair most DIYers can handle in under an hour. You’ll need a few basic tools and a replacement hose.
Tools and Materials:
- Replacement drain hose (match the diameter and length of the original, check your model number for specs)
- Hose clamps (stainless steel or galvanized, typically 3/4-inch to 1-inch size)
- Adjustable pliers or screwdriver
- Bucket and towels
- Work gloves and safety glasses
Steps:
- Shut off power at the breaker. If your dishwasher is hardwired, verify it’s dead with a non-contact voltage tester.
- Turn off the water supply to the dishwasher, typically via a shut-off valve under the sink.
- Pull the dishwasher forward slightly to access the drain connection at the rear. You may need to remove the lower kick plate and unscrew mounting brackets.
- Disconnect the old hose at the dishwasher pump outlet. Loosen the hose clamp with pliers or a screwdriver, then gently twist and pull the hose off. Expect water to drain, have your bucket ready.
- Disconnect the other end at the garbage disposal, air gap, or sink drain. Again, loosen the clamp and remove the hose.
- Install the new hose by sliding it onto the pump outlet first, then securing it with a new hose clamp. Route the hose to the sink area, maintaining a high loop (more on this in the next section).
- Attach the disposal end, ensuring a snug fit and tight clamp. Double-check that the hose isn’t kinked or stretched.
- Restore power and water, then run a short cycle to test for leaks.
If you’re unfamiliar with dishwasher installation basics, it’s worth reviewing general plumbing connections before starting.
Proper Drain Hose Installation and Positioning Tips
Even a brand-new hose will fail if it’s installed incorrectly. Proper positioning is critical to prevent backflow, ensure efficient drainage, and comply with local plumbing codes.
High loop or air gap: The International Residential Code (IRC) and many local codes require either a high loop (hose rises to within a few inches of the countertop) or an air gap fitting to prevent wastewater from siphoning back into the dishwasher. The high loop should be secured to the underside of the countertop with a bracket or tie strap. An air gap, a small chrome or plastic fitting that mounts in the sink deck or countertop, provides a visible break in the drain line and is mandated in some states.
Avoid excessive length: Don’t use more hose than necessary. Extra length increases the chance of kinks and puts additional strain on the drain pump. Most Whirlpool dishwashers are designed for hose runs of 6 feet or less from pump to drain.
Secure all connections: Use stainless steel hose clamps rather than spring clamps, they’re more reliable and resist corrosion. Tighten clamps snugly but don’t overtighten, which can damage the hose or fitting.
Check for interference: Make sure the hose doesn’t contact sharp edges, hot water lines, or the dishwasher’s insulation. Vibration during cycles can cause abrasion over time.
Test before finishing: Run a full wash and drain cycle before pushing the dishwasher back into place. Inspect all connections for leaks while the unit is accessible.
Maintenance Tips to Extend Your Drain Hose Lifespan
A little preventive care goes a long way toward avoiding drain hose problems down the road.
Clean the drain filter monthly. Most Whirlpool dishwashers have a removable filter at the tub bottom. Food debris that bypasses the filter can migrate into the hose and cause clogs. Rinse the filter under hot water and scrub with a soft brush.
Run hot water before starting a cycle. This ensures the dishwasher begins with hot water, which helps dissolve grease and detergent more effectively, reducing residue buildup in the hose.
Use the right detergent amount. Excess detergent can leave a soapy film inside the hose. Follow the manufacturer’s recommendations and consider a rinse aid to improve water sheeting.
Inspect hose and clamps annually. Make it part of your spring or fall home maintenance checklist. A quick visual check can catch early signs of wear before they become leaks.
Avoid harsh chemicals. While occasional use of a dishwasher cleaner or vinegar rinse is fine, strong drain cleaners can degrade rubber and plastic hoses.
Address drainage issues immediately. If you notice slow draining or standing water, don’t wait. Small clogs and minor kinks are easy fixes: ignoring them leads to pump strain and hose damage.
Conclusion
The drain hose might be a humble component, but it’s essential to your Whirlpool dishwasher’s performance and longevity. Regular inspection, proper installation, and timely replacement when needed will keep your dishwasher draining smoothly and your kitchen floor dry. Most drain hose issues are well within DIY territory, just remember to shut off power and water, take your time with the install, and don’t skip the high loop.