Getting the right standing desk height isn’t a luxury, it’s the difference between pain-free productivity and a sore neck by lunch. Too high, and your shoulders hunch. Too low, and your wrists bend at awkward angles. Most people guess at their desk height or rely on generic formulas that ignore their actual workspace setup. This guide cuts through the guesswork with specific measurements, real ergonomic standards, and practical adjustments anyone can make, whether they’re working with a motorized desk or stacking plywood to raise a fixed surface.
Table of Contents
ToggleKey Takeaways
- Proper standing desk height prevents musculoskeletal problems like shoulder strain, carpal tunnel, and forward head posture that compound over time, with a 90-degree elbow angle being the ergonomic gold standard.
- Calculate your ideal standing desk height by measuring from floor to elbow, then setting the desk surface 1 to 2 inches below that measurement—typically 38 to 46 inches for most adults, adjusted for individual body proportions.
- Monitor placement is independent of desk height and should have its top at eye level, usually requiring a 4 to 8 inch riser above the desktop, while keyboard and mouse placement keeps wrists straight without upward or downward angles.
- Common standing desk height mistakes include raising the entire desk to match monitor height, ignoring footwear changes, and overlooking anti-fatigue mats that add elevation—each requiring separate measurement and adjustment.
- DIY solutions for non-electric standing desks include furniture risers for raising low surfaces, keyboard tray retrofits for fine-tuning wrist position, and simple plywood or book-based monitor stands that must be tested for stability.
- Test your standing desk height for 15 minutes with shoulders relaxed and neck neutral, then adjust in half-inch increments—the goal is sustainable positioning where elbows reach 90 degrees and wrists remain straight.
Why Standing Desk Height Matters for Your Health
Improper desk height creates a cascade of musculoskeletal problems that compound over weeks and months. When a desk sits too high, users elevate their shoulders to reach the keyboard, which strains the trapezius muscles and can lead to tension headaches. Too low, and the wrists extend downward, compressing the median nerve and increasing carpal tunnel risk.
The American National Standards Institute (ANSI) and the Business and Institutional Furniture Manufacturers Association (BIFMA) publish ergonomic standards that recommend specific desk-to-elbow relationships. These aren’t arbitrary, they’re based on biomechanical research showing that a 90-degree elbow angle while typing minimizes forearm strain and maintains neutral wrist posture.
Beyond immediate discomfort, chronic poor posture affects spinal alignment. Standing with a monitor too low encourages forward head posture, which adds up to 10 pounds of extra pressure on cervical vertebrae for every inch the head tilts forward. Over time, this contributes to degenerative disc issues.
Proper desk height also impacts circulation. When users lean or reach excessively, they compress blood vessels in the arms and shoulders, leading to numbness and fatigue. Setting the correct height allows the body to maintain its natural curves, distributing weight evenly through the legs and core.
How to Calculate Your Ideal Standing Desk Height
The standard formula starts with elbow height while standing in shoes typically worn at the desk. Measure from the floor to the bottom of the elbow with arms hanging naturally at the sides, then bend the elbows to 90 degrees. The desk surface should sit 1 to 2 inches below this elbow height.
For most adults, this translates to a desk surface between 38 and 46 inches from the floor, but individual variation is significant. Someone 5’4″ might need 38 inches, while someone 6’2″ may require 44 inches or more.
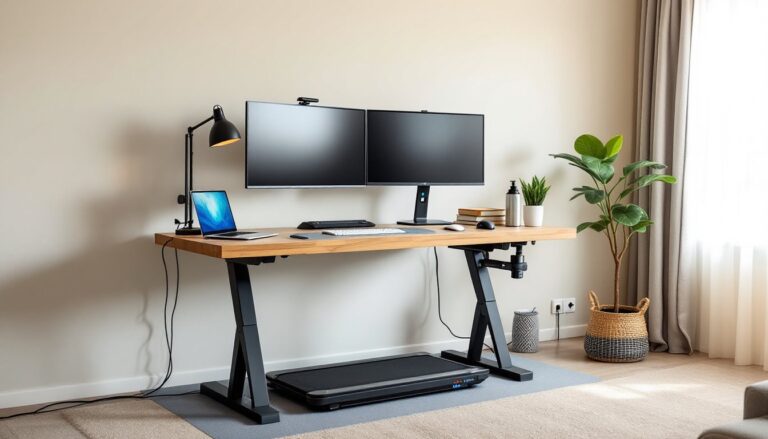
Monitor height is separate but equally critical. The top of the screen should align roughly with eye level or slightly below (about 15 to 20 degrees downward gaze). This often requires a monitor arm or riser, especially for laptop users. A typical 24-inch monitor needs its base elevated 4 to 8 inches above the desk surface for most users.
Keyboard tray systems can fine-tune positioning. If a desk surface must stay fixed at a certain height, a negative-tilt keyboard tray mounted 1 to 2 inches below the desktop can bring the typing plane down to the correct elbow height while keeping the monitor elevated.
Standard Height Ranges by Body Type
Height ranges cluster around common percentiles:
- 5’0″ to 5’4″: Desk surface 36 to 40 inches: monitor base 40 to 44 inches
- 5’5″ to 5’9″: Desk surface 40 to 43 inches: monitor base 44 to 47 inches
- 5’10” to 6’2″: Desk surface 43 to 46 inches: monitor base 47 to 50 inches
- 6’3″ and taller: Desk surface 46+ inches: monitor base 50+ inches
These are starting points, not absolutes. Arm length relative to torso height varies, and footwear adds 0.5 to 1.5 inches. Always measure with the user in their typical work stance.
Setting Up Your Standing Desk: Step-by-Step Adjustment Guide
Tools needed: Tape measure, level (optional), adjustable wrench or hex key (if adjusting manual desk)
Safety: If adjusting a motorized desk, keep fingers clear of pinch points between the desk frame and any obstacles. Unplug before servicing mechanical components.
-
Measure elbow height. Stand barefoot or in work shoes. Let arms hang naturally, then bend elbows to 90 degrees. Measure from floor to the underside of the forearm. Subtract 1 to 2 inches, that’s your target desktop height.
-
Adjust desk surface. For electric desks, use the controller to raise or lower the surface to the target height. Most controllers have memory presets, set one for standing, one for sitting if using a convertible setup. For manual crank desks, turn the handle while checking height with a tape measure. If the desk has a pneumatic lift, press the release lever and apply gentle upward or downward pressure until it locks at the desired height.
-
Level the surface. Some desks on uneven floors tilt slightly. Use adjustable feet (most standing desks have them) to compensate. A bubble level across the desktop confirms it’s flat.
-
Position the monitor. Raise the monitor so the top third of the screen is at eye level. For a 24-inch monitor, this usually means a riser or arm elevating the base 4 to 6 inches above the desk. Larger monitors (27 inches or more) may need less lift due to their height. Resources like those found on Instructables offer plans for DIY monitor risers using scrap wood and basic joinery.
-
Check keyboard and mouse placement. Both should rest on the desk surface (or keyboard tray) so wrists remain straight, not angled up or down. If wrists bend upward, the surface is too low. If they angle down, it’s too high.
-
Test for 15 minutes. Stand and work normally. Shoulders should feel relaxed, not elevated. Neck should be neutral, not craning up or down. Adjust in half-inch increments if anything feels strained.
Common Standing Desk Height Mistakes to Avoid
Setting the desk too high to match monitor height. Many users raise the entire desk so the monitor doesn’t need a separate riser. This forces the arms upward and causes shoulder fatigue. The desk and monitor have different optimal heights, treat them independently.
Ignoring footwear changes. Switching from sneakers (~1 inch sole) to dress shoes (~0.5 inch) or barefoot changes elbow height by half an inch or more. Adjust accordingly or stick to consistent footwear.
Failing to account for keyboard thickness. Mechanical keyboards add 0.5 to 1 inch of height compared to low-profile models. If switching keyboards, re-measure elbow height relative to the top of the keycaps, not the desk surface.
Using a chair-height sitting desk as a standing baseline. A standard sitting desk is 28 to 30 inches tall. Adding a riser to reach standing height often results in an unstable or wobbly surface. If the gap is more than 8 to 10 inches, consider a purpose-built standing desk or a sturdier platform.
Overlooking monitor distance. Ergonomic guidelines recommend the screen sit 20 to 28 inches from the eyes (about arm’s length). Raising a monitor on a short riser often pushes it back, which is good, but stacking books or boxes can bring it too close. Use a monitor arm for independent depth adjustment.
Skipping the anti-fatigue mat. Hard floors transmit impact through the legs and spine. An anti-fatigue mat (typically ¾ inch thick) reduces strain, but it also raises the user’s standing height by that amount. Measure elbow height while standing on the mat, not on the bare floor.
DIY Solutions for Adjusting Non-Electric Standing Desks
Not every workspace justifies a motorized standing desk. Fixed-height desks, repurposed counters, and sturdy tables can all be adapted with simple modifications.
Raising a too-low surface: Build or buy bed risers or furniture risers rated for the desk’s weight. Most desks and monitors together weigh 50 to 150 pounds: choose risers rated for at least 300 pounds per set to maintain stability. For a custom height, cut 4×4 lumber to length (actual dimensions 3.5 x 3.5 inches) and fasten a 3-inch square of ¾-inch plywood on top to create a stable platform under each leg. Sand edges and apply polyurethane to prevent splintering.
If only 2 to 4 inches of lift is needed, stack ¾-inch plywood sheets cut to desk size. Two layers give 1.5 inches: three layers give 2.25 inches. Secure layers with wood glue and 1¼-inch screws from the underside to prevent shifting. Detailed plans for laminated plywood risers appear on sites like Ana White, which provides cut lists and assembly instructions.
Lowering a too-high surface: This is trickier. If the desk has legs with adjustable feet, unscrew them fully to drop 1 to 2 inches. For fixed-leg desks, the only practical solution is cutting the legs. Measure carefully, mark all four legs identically, and use a miter saw or handsaw with a square to ensure level cuts. A circular saw works but requires a clamped guide for straight, even cuts. After cutting, sand the ends and add furniture glides to protect floors and prevent moisture wicking into the end grain.
Keyboard tray retrofit: Undermount keyboard trays install with a clamp or screw-mount track beneath the desktop. Most kits include a negative-tilt mechanism that angles the tray down 5 to 15 degrees, promoting neutral wrist posture. Installation requires drilling pilot holes for screws, typically ¾ inch deep into the underside of a solid wood or plywood desktop. For particleboard or MDF desks, use toggle bolts or threaded inserts to prevent screw pullout. Guides for installing keyboard trays with common hand tools are available on Fix This Build That.
Monitor stands: A simple box made from ¾-inch plywood or solid pine, sized 12 inches deep by 24 inches wide and 4 to 6 inches tall, provides a stable riser. Use butt joints secured with wood glue and 1¼-inch finish nails or pocket screws for a clean look. Alternatively, stack hardcover books or concrete blocks (for industrial aesthetics), but ensure they won’t tip, concrete blocks are 8 x 8 x 16 inches and very stable if oriented lengthwise.
Safety note: Any DIY riser supporting a monitor and keyboard must be stable and level. Test by pressing down firmly on all corners. If it rocks or feels flimsy, reinforce with corner braces (L-brackets) or rebuild with thicker material.
Conclusion
Dialing in standing desk height isn’t about perfect ergonomics charts, it’s about listening to what your body tells you after 20 minutes of actual work. Measure with a tape, adjust in small increments, and don’t hesitate to tweak settings as footwear, tasks, or even fatigue levels change throughout the day. Whether using a premium electric frame or a plywood riser cobbled together in the garage, the goal is the same: elbows at 90 degrees, wrists straight, and a screen that doesn’t make the neck crane. Get that dialed, and standing becomes sustainable.