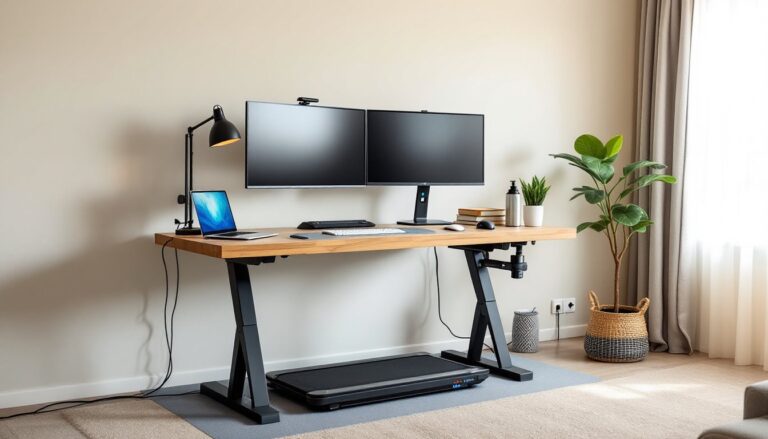
Portable dishwashers solve a problem that millions of renters and small-home owners face: how to get clean dishes without permanent plumbing or a built-in unit. Whirlpool’s portable models have been a go-to option for decades, offering solid performance in a cabinet-on-wheels format that hooks up to a standard kitchen faucet. They’re not as glamorous as a fully integrated unit, but they work, and for apartments, tiny kitchens, or homes where retrofitting plumbing isn’t an option, they’re often the best choice available. This guide walks through what sets Whirlpool’s portables apart, how to set them up correctly, and whether one makes sense for your space.
Table of Contents
ToggleKey Takeaways
- Whirlpool portable dishwashers offer full-sized capacity (12 place settings) without permanent plumbing installation, making them ideal for renters and small kitchens.
- A Whirlpool portable dishwasher requires proper setup including faucet adapter installation, level positioning, and GFCI outlet access—a straightforward process that takes about 30 minutes.
- These units use 3.5–4.5 gallons of water per cycle and cost approximately $35–$40 annually to operate, offering reasonable efficiency within the portable dishwasher class.
- Regular maintenance—including monthly filter cleaning, hose inspections, and proper drainage after each use—ensures long-term reliability and prevents leaks.
- Whirlpool portables excel with everyday dishes and cookware but may struggle with oversized items, baked-on food, and pull-down faucets, so compatibility checks are essential before purchase.
What Makes Whirlpool Portable Dishwashers Stand Out
Whirlpool portable dishwashers occupy a specific niche: they’re built for people who need dishwashing power without a permanent installation. Unlike countertop models, these are full-sized units on rolling casters, typically measuring around 24 inches wide and standing about 36 inches tall. That’s the same width as most standard built-in dishwashers, so rack capacity is comparable.
The key differentiator is the quick-connect adapter that attaches to your kitchen faucet. You wheel the unit over, hook it up, run your cycle, then disconnect and roll it back to storage. It’s a plug-and-play solution that doesn’t require modifying cabinetry or running dedicated water lines.
Whirlpool has been manufacturing dishwashers since the 1960s, and their portable line benefits from that experience. Build quality tends to be a step above off-brand portables, thicker tub walls, better door seals, and more reliable pumps. The tradeoff is price: Whirlpool units typically run $500–$800, compared to $300–$500 for budget alternatives. You’re paying for a name, but also for parts availability and a more robust warranty structure.
Key Features and Specifications
Whirlpool’s current portable models share a common feature set, with variations in finish and minor control differences. Here’s what you’ll find:
Capacity and Interior Layout
- Place settings: 12 standard place settings, comparable to most 24-inch built-ins
- Upper rack: Adjustable height on most models: handles cups, glasses, and smaller bowls
- Lower rack: Designed for plates, platters, and larger cookware
- Silverware basket: Removable: splits into sections for better water circulation
The tub is stainless steel on mid-tier and up models, which resists staining and holds heat better than plastic. Entry-level units may use a plastic tub, it works fine but doesn’t dry as effectively.
Wash Cycles and Options
Most Whirlpool portables offer 4–6 wash cycles, including:
- Normal Wash: everyday dishes, moderately soiled
- Heavy/Pots & Pans: extended wash time, higher water temperature
- Light/China: gentle cycle for delicate items
- Rinse Only: holds dishes until you’re ready to run a full load
- 1-Hour Wash: quick turnaround for lightly soiled loads
Some models add a Soak & Clean cycle for baked-on food. Water temperature during the main wash typically reaches 140–150°F, which meets NSF/ANSI standards for sanitizing when paired with heated dry.
Energy and Water Use
Portable dishwashers use more water than built-ins because they lack a permanent drain connection and rely on gravity drainage. Expect around 3.5–4.5 gallons per cycle, versus 3–4 gallons for an efficient built-in. Energy consumption hovers around 280–310 kWh/year, which translates to roughly $35–$40 annually in electricity costs at average U.S. rates.
They won’t carry an Energy Star rating, portables are exempt from that certification due to their connection method, but Whirlpool models are reasonably efficient within their class.
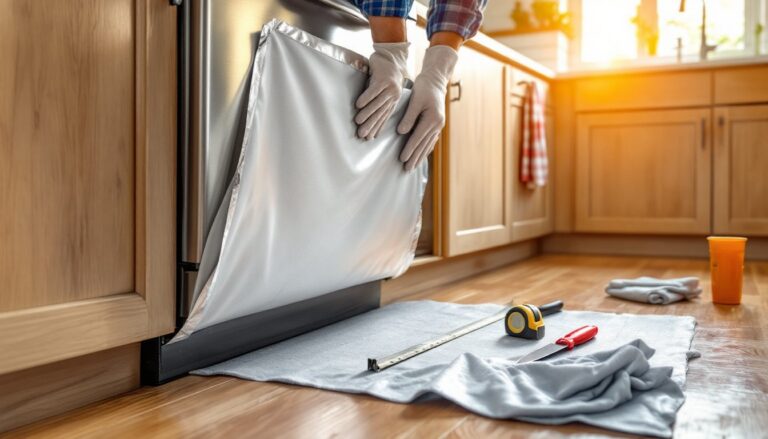
Installation and Setup Guide
Setting up a Whirlpool portable dishwasher is straightforward, but there are a few steps worth doing carefully to avoid leaks or damage.
What You’ll Need
- The dishwasher unit (assembled, on casters)
- Quick-connect faucet adapter (included)
- Adjustable wrench or slip-joint pliers
- Teflon tape (optional but recommended)
- Level surface near sink
- GFCI-protected outlet within reach of the power cord (usually 4–5 feet)
Step-by-Step Setup
-
Check your faucet compatibility. The adapter fits most standard kitchen faucets with external threads (known as an aerator). Pull-down, pull-out, or spray faucets usually won’t work without an aftermarket adapter. If your faucet has no threads, you’ll need a universal adapter kit, hardware stores carry them for around $10–$15.
-
Install the faucet adapter. Unscrew your existing aerator (turn counterclockwise). Wrap the faucet threads with one layer of Teflon tape to prevent drips. Thread the Whirlpool adapter onto the faucet and hand-tighten, then snug it with pliers, don’t overtighten or you’ll crack the adapter.
-
Position the dishwasher. Roll the unit to within hose reach of the sink. The fill hose is typically 5–6 feet long: the drain hose is similar. Leave a few inches of clearance behind the unit for hose routing. The floor should be level, if the unit tilts forward or back, drainage and door closure can be affected.
-
Connect hoses. Attach the fill hose (with the threaded coupling) to the faucet adapter. You’ll hear a click when it seats properly. Route the drain hose into the sink, making sure the end sits securely and won’t flip out under water pressure. Some models include a suction cup or clip to hold it in place.
-
Plug in and test. Connect the power cord to a GFCI outlet. Turn on the faucet, hot water only, and start a rinse cycle to check for leaks at the faucet connection and around the door gasket. If you see drips at the adapter, disconnect, add another wrap of Teflon tape, and reconnect.
No permit or permanent modification is required. This is a temporary connection, so it’s legal in apartments and rentals, just confirm with your lease that portable appliances are allowed.
Performance and Cleaning Capabilities
Whirlpool portables deliver cleaning results comparable to their built-in cousins, provided you load them correctly and use quality detergent. The spray arm design, one rotating arm at the bottom, sometimes a secondary arm mid-rack, covers most dish surfaces. Taller items like mixing bowls or cookie sheets can block spray paths, so placement matters.
What They Handle Well
- Everyday dishes: plates, bowls, mugs, utensils
- Glassware: wine glasses, tumblers (use the upper rack and delicate cycle)
- Cookware: sauté pans, baking dishes, pot lids (lower rack, heavy cycle)
Where They Struggle
- Oversized items: stock pots, large mixing bowls, and sheet pans over 13 inches may not fit or block water flow
- Baked-on food: portables lack the high-pressure jets and steam assists found in premium built-ins: pre-scraping helps
- Plastics: lightweight items can flip during the wash and fill with water, especially on the bottom rack
Detergent choice makes a difference. Use automatic dishwasher detergent in powder, gel, or tablet form, never hand dish soap, which will overflow with suds. Tablets designed for hard water conditions include extra rinse agents and help prevent spots on glassware.
Drying performance is decent but not exceptional. The heated dry cycle works, but plastic items often come out damp. Cracking the door open after the cycle finishes speeds up air drying and prevents musty odors.
Maintenance Tips for Long-Term Reliability
Portable dishwashers demand more attention than built-ins because they’re moved, connected, and disconnected regularly. A little maintenance prevents most breakdowns.
After Every Use
- Disconnect hoses and drain residual water. Lift the fill hose and drain hose to clear standing water. This prevents mildew and extends hose life.
- Wipe down the door gasket with a damp cloth. Food particles and grease build up here and cause leaks.
- Check the faucet adapter for drips. If it’s leaking, replace the internal washer, Whirlpool sells replacement washers for a few dollars.
Monthly Tasks
- Clean the filter. Located at the bottom of the tub, the filter traps food debris. Rinse it under hot water and scrub with a soft brush. A clogged filter reduces cleaning power and can damage the pump.
- Inspect hoses for cracks or kinks. Replace any hose that shows wear, ruptured hoses flood kitchens. Whirlpool OEM hoses are available through appliance parts suppliers: aftermarket versions work but check the thread pitch.
- Run a cleaning cycle with dishwasher cleaner or a cup of white vinegar on the top rack. This dissolves mineral deposits and grease buildup inside the spray arms.
Every 6–12 Months
- Check the spray arms. Remove them (they usually twist off) and clear any debris from the spray holes. A toothpick or small wire works well.
- Lubricate the casters. The wheels can get stiff from detergent residue and moisture. Wipe them down and apply a drop of silicone lubricant (not WD-40, which attracts dust).
- Inspect the door latch and hinges. Tighten any loose screws. A misaligned door won’t seal properly and will leak during operation.
Safety Note
Always disconnect the unit from power and water before performing any maintenance. Wear rubber gloves when handling the filter or spray arms, dishwasher interiors can harbor sharp debris.
Is a Whirlpool Portable Dishwasher Right for Your Home?
Portable dishwashers aren’t for everyone, but they’re a practical solution in specific situations. Here’s when they make sense, and when they don’t.
Good Fit Scenarios
- Renters who can’t modify plumbing or cabinetry
- Small kitchens without space for a built-in unit
- Homes with limited counter space where a countertop dishwasher is too small
- Temporary living situations (extended stays, mobile homes, in-law units)
- Second kitchens in basements, workshops, or home offices
When to Skip It
- You have a pull-down or pull-out faucet. Adapter compatibility is hit-or-miss, and aftermarket adapters can leak.
- Your kitchen faucet is wall-mounted. The connection method won’t work without major modification.
- You need high-volume dishwashing. Running multiple loads per day is tedious with hookup/disconnect cycles.
- Floor space is tight. The unit occupies about 6–8 square feet when parked, plus clearance for the door swing.
Alternatives Worth Considering
If a portable doesn’t fit your needs, other dishwasher types include:
- Countertop dishwashers: 4–6 place settings, no floor space required, but very limited capacity
- 18-inch built-ins: permanent installation, narrower than standard, works in tight galley kitchens
- Drawer dishwashers: single or double drawer units that install like a built-in but offer flexible loading
For most people in rentals or small homes, a Whirlpool portable hits the sweet spot: full-sized capacity, no permanent installation, and proven reliability from a major manufacturer.
Conclusion
Whirlpool portable dishwashers deliver dependable performance in a format designed for people who can’t install a built-in unit. They’re not perfect, they use slightly more water, require hookup effort, and take up floor space, but for renters and small-space dwellers, they’re often the only full-capacity option available. Set them up correctly, keep the filter clean, and maintain the hoses, and they’ll handle daily dish duty for years. If your kitchen has a compatible faucet and a few square feet to spare, they’re worth the investment.